Synology DS1621xs+ – Part 3, SSD Read/Write Cache Acceleration
Quick Links
Part 2 – RAID selection and virtual machine creation
Part 3 – This page
Background
Following on from part two of this blog series, where we created a new RAID 10 volume on the NAS and deployed a Windows 10 virtual machine running on Synology Virtual Machine Manager, I wanted to see what kind of performance gain we could see by adding some SSD Read/Write cache to the storage volume.
Configuration
We need a baseline to work from, I chose to use Crystal Disk Mark to benchmark the performance. Now I know many people will say this isn’t the best tool out there, and you are probably right but as a quick comparison tool, it is good enough for the purposes we are using it for here.
These are the results from running Crystal Disk Mark without any SSD Cache. There are six SATA drives running in RAID 10. I increased the test file size to 8GB to avoid any caching to the 4GB of memory available to the virtual machine. The results are still pretty good but we need to remember this is all contained within the NAS. There is no network bottleneck for iSCSI traffic to think about here.
SSD Cache Setup
The SSD Cache is configured in the storage manager on the NAS.
Within the storage manager, select SSD Cache.
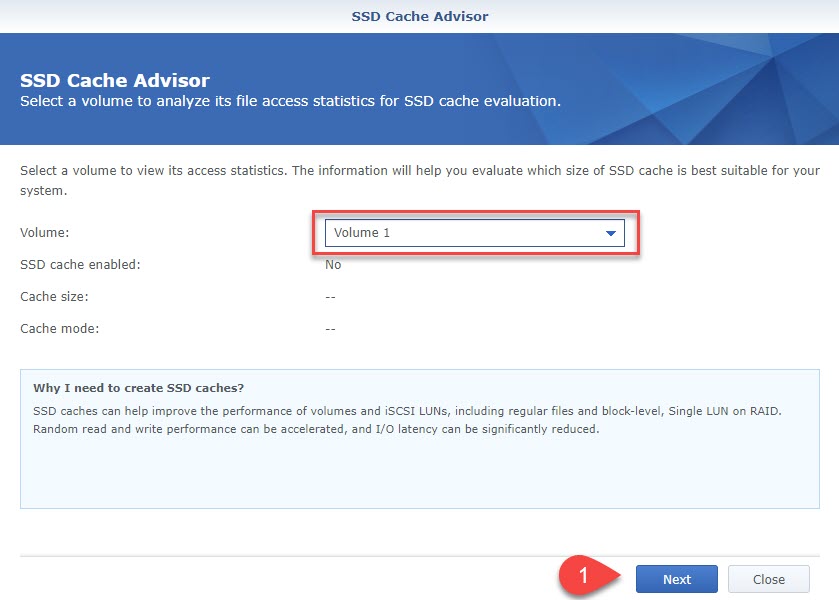
A nice feature here is the SSD Cache Advisor which will give an indication as to if any of the workloads on the NAS will benefit of SSD Cache acceleration.
Analyse the storage volume. There is only one volume on this system.
And we can see a recommended cache size. This just happened to be the size of the Windows 10 VM running on the NAS.
Back to the main SSD Cache page, let’s create a new SSD cache.
The NAS has two SSD devices installed, so we can enable the Read / Write Cache.
Choose the drives that will participate in the Cache.
Ensure the virtual machines are shut down.
Choose RAID 1.
I chose to use all the available SSD capacity for the Cache.
Make note of the warning that data loss will occur if the SSDs are removed from the system. THey need to be safely removed from the storage volume before removing them from the system.
et voilà. The Cache hit rate window below does update real-time. It is interesting to watch as hot data moves into the Cache and the hit rate moves towards 100%
SSD Cache Enabled Test
I ran the same test again within the Windows 10 VM, the only difference this time was that the SSD Cache is enabled. There was a significant jump in the read throughput, nearly five times quicker for both sequential and random reads as well as improvements to write operations.
Conclusion
As we can see, it is well worth investing in some SSD cache for acceleration. What is surprising for me is just how much more throughput was achieved for the read operations, when the RAID 10 setup is already biased to improved read speeds.


