How to replace SSL certificates on Nimble Storage array
How to replace SSL certificates on Nimble Storage array.
As the title suggests, I will walk you through how to replace the SSL certificates on a Nimble Storage array with a certificate signed by a Microsoft certificate authority.
If you look up the instructions in Nimbles documentation you will find the following:
Create the certificate or CSR:
1 |
<samp class="ph codeph">NimbleOS $ cert --gen custom-csr --subject '/C=US/ST=CA/L=San Jose/O=Nimble Storage/OU=Engineering/CN=AF106656' \ --dnslist group-kp-vma.nimblestorage.com,kp-vma.nimblestorage.com</samp> |
You must then cut-and-paste the certificate request output into a CA signing request:
1 |
<samp class="ph codeph">NimbleOS $ cert --import custom-ca</samp> |
Then cut-and-paste the CA certificate and the output from the signing into the command inputs below:
1 |
<samp class="ph codeph">NimbleOS $ cert --import custom</samp> |
Which seems pretty straight forward but there are a couple of things to watch out for along the way.
Step 1: Generate the CSR
Log into the array via SSH. Run cert –help to check out all the options available to use with the cert command.
1 2 3 4 5 6 7 8 9 10 11 12 13 14 15 16 17 18 19 20 21 22 23 24 25 26 27 28 29 30 31 32 33 34 35 36 37 |
Nimble OS $ cert --help Usage: cert [options] Manage SSL/TLS certificates for web browser access and Group Management APIs. Available options are: --help Program help. --gen {array|group|custom|custom-csr} Generate the specified certificate type. --subject text Subject or common name for the certificate. --dnslist text List of DNS names to include in the Subject Alternate Name. --iplist text List of IP addresses to include in the Subject Alternate Name. --num_days text Validity days. --check Check the current subject, DNS list, and IP list of the current group certificate against provided inputs. --force Force overwriting of certificate chain if it exists. --import {custom-ca|custom} Import CA or signed certificate for custom certificate chain. --delete {custom} Delete a certificate chain. --use {array|group|custom} Select which certificate chain to use for HTTPS or APIs. --https Use the named certificate chain for HTTPS access. --apis Use the named certificate chain for access to APIs. --list List currently available certificates. --info {array|group|custom|custom-ca|custom-csr} Show properties of the given certificate. |
You can see some of the variables such as –iplist that are not given in the example on the Nimble Infosight portal.
Now construct your certificate request so it looks something like this. I found the / in the example did not seem to work when creating a request.
1 |
cert --gen custom-csr --subject '/C=YourCountryCode/ST=YourState/L=YourLocation/O=Nimble Storage/OU=Engineering/CN=yourarrayname.domainname.local' --iplist 10.0.1.1 |
Which will generate an output similar to below
1 2 3 4 5 6 7 8 9 10 11 12 13 14 15 16 17 18 19 20 21 |
subject=/C=YourCountryCode/ST=YourState/L=YourLocation/O=Nimble Storage/OU=Engineering/CN=yourarrayname.domainname.local -----BEGIN CERTIFICATE REQUEST----- MIIDDDCCAfQCAQAwgYwxCzAJBgNVBAYTAlVLMRcwFQYDVQQIDA5Ob3J0aHVtYmVy bGFuZDEUMBIGA1UEBwwLQ3JhbWxpbmd0b24xFzAVBgNVBAoMDk5pbWJsZSBTdG9y YWdlMRQwEgYDVQQLDAtwwdsffsslcmluZzEfMB0GA1UEAwwWc2ZhMTAwLnNpdHNn cm91cC5sb2NhbDCCASwwdsdsffwIhvcNAQEBBQADggEPADCCAQoCggEBAKntq/wD sEzgg38OJlaYOmKjZDoi+MJbW714V83kneiInaMKJeYZ8QtEKJQe0pn6bhwvfCU2 sLtFGjhBas7cpxN90TIGG3fn57V72pvYGalkAPaFsvNC8j9H/c1NoPs6Jg6+YQVY Gp+zBg6eqHjGwqi8wbI9ereffeePB6EWjiAVsRFH/TzcLGRJISejUNAeHjTSvGD0 sN32khW8ys/sMvm3sRYMzadadadK8WKJExP2Y0CmxX8Gm7nLpyTRQ7A7yxaXeg0g /bhyhAQX7hg8JFJfXm44/eagspnALzIrSu7axB6EPHGbxiTdNUtAlzYgcdG1G9G9 wjoCg0jTHgEE+K0CAwEAAsdsdsgGCSqGSIb3DQEJDjErMCkwJwYDVR0RBCAwHoIW U0ZBMTAwLnNpdHNncm91cC5sb2NhbIcECgB4pTANBgkqhkiG9w0BAQsFAAOCAQEA FZj2gI2kM6wODwtveZxqmAaD0GXi01r8HP5/5fVo9uJR5NuBv8Yq02x6a4kGDeUo O56NAOEhw836WYwM02mE9h6OTrATsxpXQTOCcxMfR8PYKdbnrQymCUYwD3iZcK9A evxcJwEBMazLua7JpESv9evNmxdKal7iFsbaHIAO7lGFBBstL+tc5Fl0d7cwBq2g i7BH+Vgc0XUaqBPhBWHTv4em+yuQxYIfGX+GiHyOA5BBNF9Z5TFbTMJtOFmXNb7M R4hfXT4tZ3RQR0J35lno2PWOhHtuxRYxpzziywapbRH8+3BWXofoxSqp53GV5uuT XWpFIgAF1G1h5LILsfqR4g== -----END CERTIFICATE REQUEST----- |
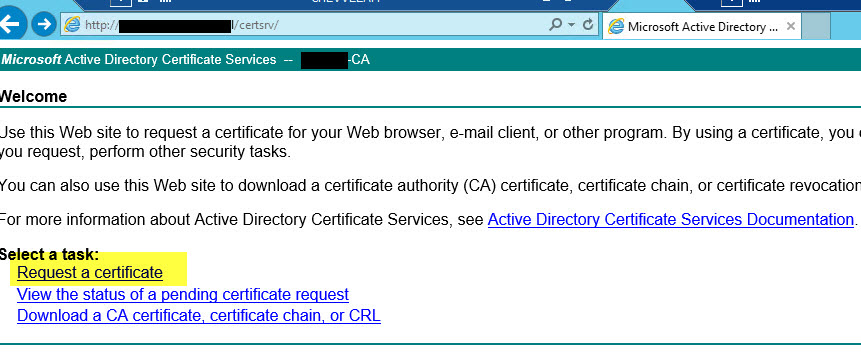
Step 2: Request the certificate for the certificate authority
Copy the CSR that has been generated and head over to the certificate authority web page. Typically the webpage for this is https://yourCA.domain.local/certsrv. Choose to request a certificate
Then an advanced request then the following option.

Paste the CSR into the window as below and choose an appropriate certificate template. The template I have setup for vSphere 6 VCSA has all the options required for this process already configured. Then hit submit

Then download the certificate file in base 64 once it has been generated and save it some where in the .CER file format.

You will also need to grab a copy of your root and intermediate certificates from the certificate authority.
Step 3: Import the certificates to the array.
Before importing the the signed certificate, the root certificate needs to be imported. This is where the cert –import custom-ca command is used. Open the root certificate you just downloaded with notepad or similar and copy the certificate text. Then run the certificate import command from the SSH session
1 2 3 4 5 6 7 8 9 10 11 12 13 14 15 16 17 18 19 20 21 22 23 24 |
cert --import custom-ca Please enter certificate in PEM format followed by ^D: -----BEGIN CERTIFICATE----- MIIDjDCCAnSgAwIBAgIQeno//hWMGIxPwYADoqsQvzANBgkqhkiG9w0BAQsFADBO MRUwEwYKCZImiZPyLGQBGRYFbG9jYWwxGTAXBgoJkiaJk/IsZAEZFglzaXRzZ3Jv dXAxGjAYBgNVBAMTEVNJVFMgR3JvdXAgU0hBMjU2MB4XDTE2MTAyNTE1MjgxNFoX DTM2MTAyNTE1MzgxM1owTjEVMBMGCgmSJomT8ixkARkWBWxvY2FsMRkwFwYKCZIm iZPyLGQBGRYJc2l0c2dyb3VwMRowGAYDVQQDExFTSVRTIEdyb3VwIFNIQTI1NjCC ASIwDQYJKoZIhvcNAQEBBsdfsfsdrwfwegrCggEBAMcrzjWcLm3Y+0L/wDpANpN8 4tT4IS2tcXA0HLfcNUo0To+K0R69LrjYUJdxUJ1sdTDiBsR9doBdJokKXhThuu5X 38oJ/g2dT5+fn/dddddddddddddddddddddixQ9kvm7GEZY+l+Illpjrw7ja6EwL l138d6d8FCDsZFdddddddddddddddddddddHf1MXUHC18gSp6gw2CTNoBujh88Sy ga1qOFKXZfl42ddddddddddddddddddddddXeC+EVWw+lJ942ZGmorCeF32KZvFn 22+yejgDyAey83g9cddddddddddddddddddCDcnVepA8Xm00IJmTY6WJy6pr8LUC AwEAAaNmMGQwEwYJKddddddddddddddddddDAEEwCwYDVR0PBAQDAgGGMA8GA1Ud EwEB/wQFMAMBAf8wHQYDdddddddddddddddiYexKLfvOg9D1cyLd5BQfMBAGCSsG AQQBgjcVAQQDAgEAMA0GCSqGSIb3DQEBCwUAA4IBAQCgwb1DaoCeQJJbRnHIW8Z6 wdfCusGjj0DK/tqnmTxxr/I6QkDszpz15+3OYzNm1rReQJKKDUEJWxeR9anIVAy5 z4clFd+yKmyxORKTAJ3v5pGZoKX35WqpzL7emOprGrw87b2VapFjC1xtPlW3Wq2F gN4OtPzbCumkNff/YLuJYhFQRBsARCegO3FHgcrZqB8AAQPKEeWK6cHRNeMnCouC UTnlbWKyL6avzIV8mgWNDo+slSedykjdGIyrcrz06YiPxQBbGqMUvpa2/y2nZ6Au 685BFUpAgViez+6A7yZm/YRFfIcR3uowAoShkKi8pzkoqqrHnFEE/7+B+ZUg5kUQ -----END CERTIFICATE----- <--- CARRIAGE RETURN HERE PRESS CTRL+D HERE |
2 things to note above. After you have pasted the certificate you need to input carriage return to drop to the next line,THEN you need to input CTRL+D to submit the certificate.
Next and final step is to import the custom certificate using the cert —import custom command
1 2 3 4 5 6 7 8 9 10 11 12 13 14 15 16 17 18 19 20 21 22 23 24 25 26 27 28 29 30 31 32 33 34 35 36 37 38 39 40 41 |
cert --import custom Please enter certificate in PEM format followed by ^D: -----BEGIN CERTIFICATE----- MIIGkDCCBXigAwIBAgITZwAAABbhjeZLg8Yb8wAAAAAAFjANBgkqhkiG9w0BAQsF ADBOMRUwEwYKCZImiZPyLGQBGRYFbG9jYWwxGTAXBgoJkiaJk/IsZAEZFglzaXRz Z3JvdXAxGjAYBgNVBAMTEVNJVFMgR3JvdXAgU0hBMjU2MB4XDTE3MDcxMzA4NTU1 MloXDTI3MDcxMTA4NTU1MlowgYwxCzAJBgNVBAYTAlVLMRcwFQYDVQQIEw5Ob3J0 aHVtYmVybGFuZDEUMBIGA1UEBxMLQ3JhbWxpbmd0b24xFzAVBgNVBAoTDk5pbWJs MIIGkDCCBXigAwIBAgITZwAAABbhjeZLg8Yb8wAAAAAAFjANBgkqhkiG9w0BAQsF ADBOMRUwEwYKCZImiZPyLGQBGRYFbG9jYWwxGTAXBgoJkiaJk/IsZAEZFglzaXRz Z3JvdXAxGjAYBgNVBAMTEVNJVFMgR3JvdXAgU0hBMjU2MB4XDTE3MDcxMzA4NTU1 MloXDTI3MDcxMTA4NTU1MlowgYwxCzAJBgNVBAYTAlVLMRcwFQYDVQQIEw5Ob3J0 aHVtYmVybGFuZDEUMBIGA1UEBxMLQ3JhbWxpbmd0b24xFzAVBgNVBAoTDk5pbWJs yxaXeg0g/bhyhAQX7hg8JFJfXm44/eagspnALzIrSu7axB6EPHGbxiTdNUtAlzYg cdG1G9G9wjoCg0jTHgEE+K0CAwEAAaOCAyYwggMiMCcGA1UdEQQgMB6CFlNGQTEw MC5zaXRzZ3JvdXAubG9jYWyHBAoAeKUwHQYDVR0OBBYEFOhSsKWaH/wrbYX9xjOJ fJcVQb0iMB8GA1UdIwQYMBaAFFLIZuTiYexKLfvOg9D1cyLd5BQfMIIBHAYDVR0f BIIBEzCCAQ8wggELoIIBB6CCAQOGgcFsZGFwOi8vL0NOPVNJVFMlMjBHcm91cCUy MFNIQTI1NixDTj1TSVRTQ0EwMixDTj1DRFAsQ049UHVibGljJTIwS2V5JTIwU2Vy dmljZXMsQ049U2VydmljZXMsQ049Q29uZmlndXJhdGlvbixEQz1zaXRzZ3JvdXAs REM9bG9jYWw/Y2VydGlmaWNhdGVSZXZvY2F0aW9uTGlzdD9iYXNlP29iamVjdENs cm91cCUyMFNIQTI1NixDTj1BSUEsQ049UHVibGljJTIwS2V5JTIwU2VydmljZXMs Q049U2VydmljZXMsQ049Q29uZmlndXJhdGlvbixEQz1zaXRzZ3JvdXAsREM9bG9j BQUHAQEEggEnMIIBIzCBuAYIKwYBBQUHMAKGgatsZGFwOi8vL0NOPVNJVFMlMjBH cm91cCUyMFNIQTI1NixDTj1BSUEsQ049UHVibGljJTIwS2V5JTIwU2VydmljZXMs Q049U2VydmljZXMsQ049Q29uZmlndXJhdGlvbixEQz1zaXRzZ3JvdXAsREM9bG9j YWw/Y0FDZXJ0aWZpY2F0ZT9iYXNlP29iamVjdENsYXNzPWNlcnRpZmljYXRpb25B dXRob3JpdHkwZgYIKwYBBQUHMAKGWmh0dHA6Ly9zaXRzY2EwMi5zaXRzZ3JvdXAu bG9jYWwvQ2VydERhdGFTSVRTQ0EwMi5zaXRzZ3JvdXAubG9jYWxfU0lUUyUyMEdy b3VwJTIwU0hBMjU2LmNydDAPBgNVHRMBAf8EBTADAQH/MA4GA1UdDwEB/wQEAwIB hjA9BgkrBgEEAYI3FQcEMDAuBiYrBgEEAYI3FQiEyqt9go/gVcWBPofmriOC09dr tX2i42scdw/CGRw9fWcAhdsUvf1C3moLo9Ct5GfWe60/FQLZNNH/jVgxDfstfnxg 0m+sep2prQlJ58j5kNHF/6+r36cmFABjOE3enzyOUM5y8AILOkFqydkz9NSMy7Os zAaRwK+okwSwV6+bjvvAki8+/Bm3dzVRVEKJtcKn7XC2CXW9KMG5hgEJvaHNlUR9 2uD01wjE/9BD1/RA+YPplJKHKa0ZVuDG86X9UnnKxJ6Ce/DkhDc5JtG07EF10vJ0 tX2i42scdw/CGRw9fWcAhdsUvf1C3moLo9Ct5GfWe60/FQLZNNH/jVgxDfstfnxg 0m+sep2prQlJ58j5kNHF/6+r36cmFABjOE3enzyOUM5y8AILOkFqydkz9NSMy7Os 6DjnOw== -----END CERTIFICATE----- INFO: custom certificate chain installed for API use INFO: custom certificate chain installed for HTTPS use |
Same as before, hit carriage return after the END CERTIFICATE line followed by an input of CTRL+D to commit the certificate. Note how the custom certificate chain is now in use for AP and HTTPS access. Verify the certificate works by browsing to the array in your favourite web browser.
That’s it!
Ian


Thanks. Worth noting that at least in 5.0.2.0, the HTTPS and APIs certs are automatically switched to
customonce the final import takes place. I didn’t like that, but maybe some people do.Otherwise:
cert –use custom –https
cert –use custom –apis
Hi Matt, thanks for the tip. That was not something I was aware of. I am sure other people will find that useful.
Cheers,
Ian
How do you add the Intermediate (issuing CA)? I tried both the custom-ca and custom parameters, but it bombs on both.
Hi Brian,
The step where you import custom CA, the root and the intermediate need to be pasted in at the same time. So it would look something like —-begin cert—- THE ROOT CERT —-end cert—-
—-begin cert—- THE INTERMEDIATE CERT —-end cert—-
If it’s from a Windows CA, you can download the certificate chain, or if they have been distributed round your org, you can export the root and intermediate from a workstation and combine them in a text editor before pasting into the SSH session.
Hope this helps,
Ian
Brilliant! Thank you so much! I had tried just about every combination but that. It worked, and I’m off and running!
I can confirm that as of 20-Aug-2018 and NimbleOS 5.0.4.0-576551, entering the chain certificate from windows CA does not work. If you enter your root certificate along with the intermediary certificate in one file (base64 and copy it in notepad) does work.
I would like to ask, if I want to add multiple subject names how would I do that, if it is supported of cource.
Hi,
Looking at the commands available I would imagine you can use the –dnslist option to specify multiple subject alternate names. So the request would look something like this. “cert –gen custom-csr –subject ‘/C=YourCountryCode/ST=YourState/L=YourLocation/O=Nimble Storage/OU=Engineering/CN=yourarrayname.domainname.local’ –dnslist SAN1.yourdomain.local,SAN2.yourdomain.local”
Admittedly I have not added SANs to a cert used for a Nimble array, but I can not see why it would not work.
Cheers,
Ian
Thanks for the post and it is very useful. Are there aby REST APIs corresponding to these commands for creating csr and uploading certificate to Nimble? I want to automate this process using REST APIs.
Regards,
Koteswar
Hi Koteswar,
Sorry, I am not sure if there are REST APIs associated with this. There may be something in the admin guides on Infosight to help out?
Ian
You say “The template I have setup for vSphere 6 VCSA has all the options required for this process already configured.”
But you don’t tell us what the required options are?
Details on how to create a VMCA certificate template can be found here https://kb.vmware.com/s/article/2112009#creating_new_template_for_vsphere_6.x_to_use_for_vmca_as_subordinate_ca
Ian